Create an App
Create an app using App Builder in Data Admin.
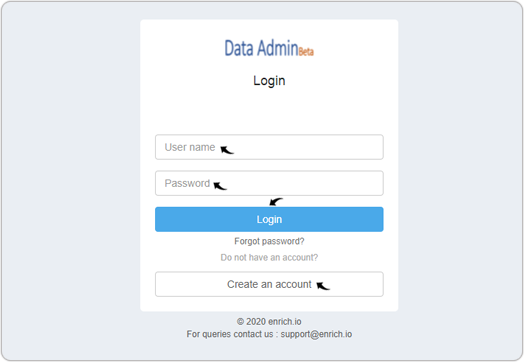
Login
- Enter User name, Password, and click Login on the Data
Admin portal. If you are new to the Data Admin, click Create an
account. For more details on how to create an account, refer section
Create an
account.Note: Contact support@enrich.io for Enrich.io portal access, subscription plans, pricing, and for any further support.
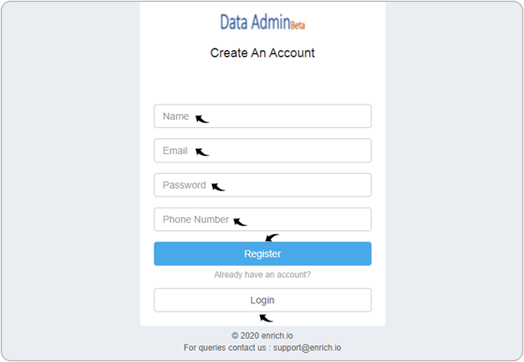
Create an account
- Create An Account page will be displayed when you click Create an
account in above step. Enter Name, Email,
Password, Phone Number, and click Register for the
new account. Note: If you already have an Data Admin account, click Login for your account.
- A Success pop-up will be displayed and a verification email will be sent to
your Email.Note: If you do not receive a verification email, follow the instruction as specified in the success pop-up.
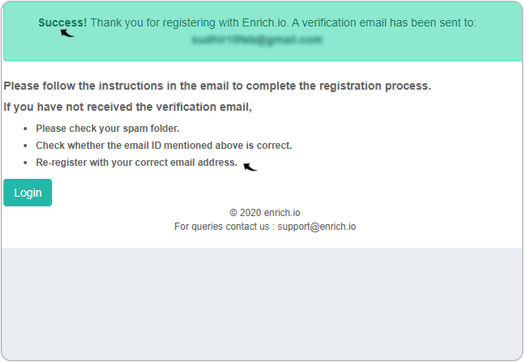
- Open your Email inbox and verify the email address. Once your email verified and your account is approved by the Enrich.io then you will be able to login to the Data Admin panel.
Create a New App
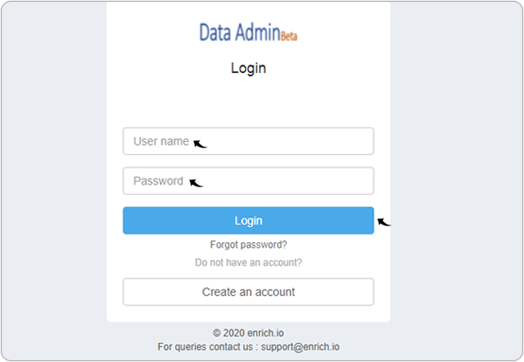
- Enter User name, Password, and click Login on the Data
Admin portal.
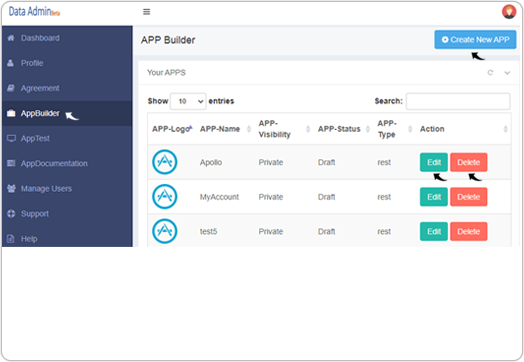
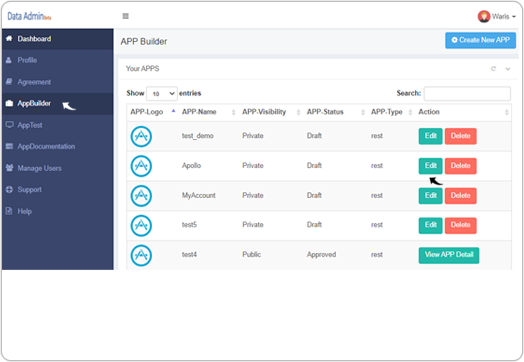
- Click AppBuilder on the left-side navigation panel and on the APP
Builder page click Create New APP.Note: Click Edit to edit existing App or click Delete to delete the existing App.
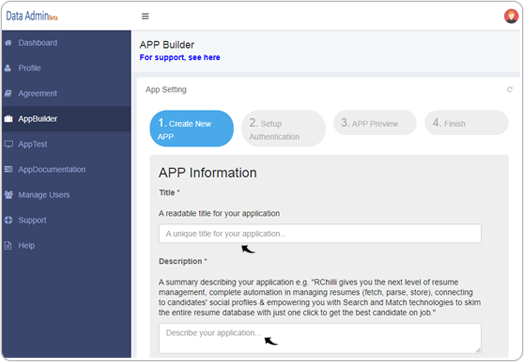
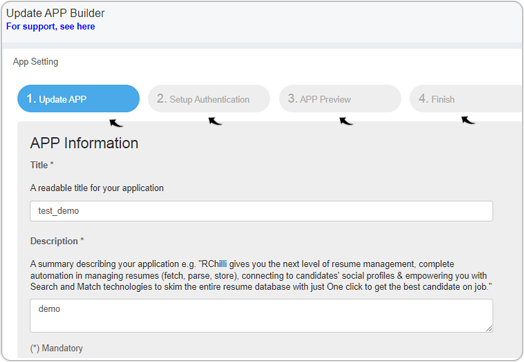
- Step 1 - Create New APP: Give an unique Title and
briefly provide Description details. The title must be new and
unique.
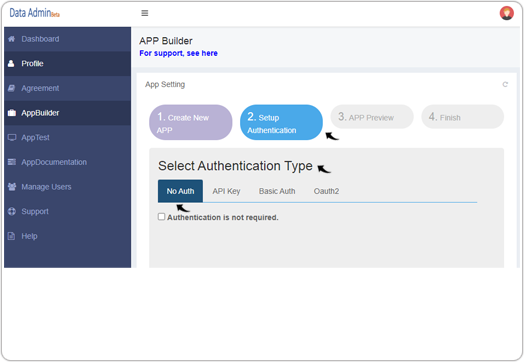
- Step 2 - Setup Authentication: There are four ways to Select
Authentication Type as follows:
- No Auth: Authentication is not required in this
authentication method.
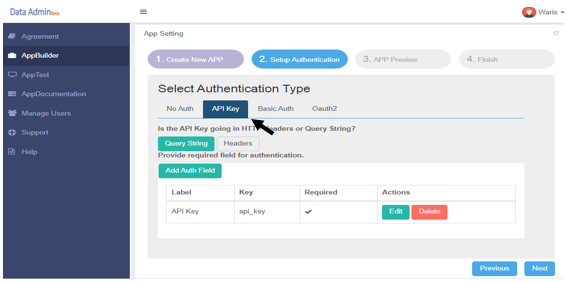
- API Key: In API Key authentication method:
- Choose if API key is going in the Query String or Headers.
- Add Auth Field as necessary. You can Edit or
Delete the auth fields as needed.
- Basic Auth: In Basic Auth authentication method:
- Choose if authorization token to be sent as Basic Token or Bearer Token.
- Add Auth Field as necessary. You can Edit or
Delete the auth fields as needed.

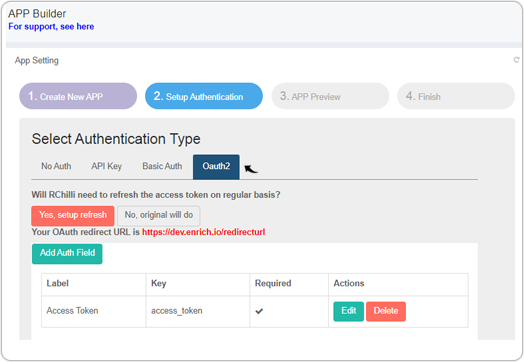
- Oauth2: In Oauth2 authentication method:
- Choose if Enrich.io needs to refresh the access token. You will get a OAuth redirect URL.
- Add Auth Field as necessary. You can Edit or
Delete the auth fields as needed.
-
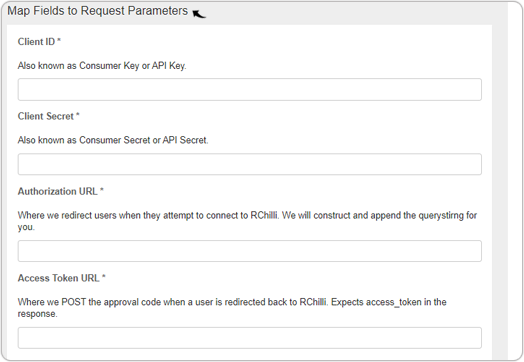
You need to Map fields to Request Parameters:
-
Client ID*: Also known as Consumer Key or API Key
-
Client Secret*: Also known as Consumer Secret or API Secret
-
Authorization URL*: Where we redirect users when they attempt to connect to enrich.io. We will construct and append the query string for you.
-
Access Token URL*: Where we POST the approval code when a user is redirected back to enrich.io. Expects access_token in the response
-
Refresh Token URL: Where we POST to refresh an access_token
-
Access Token Placement: Tokens placed in headers will look like Authorization: Bearer and tokens in query strings will look like ?access_token=
-
- No Auth: Authentication is not required in this
authentication method.
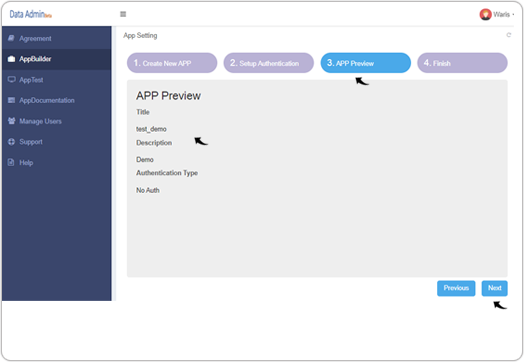
- Once you selected the authentication type in the above step, you can view
the APP Preview in the next step. Click Next.
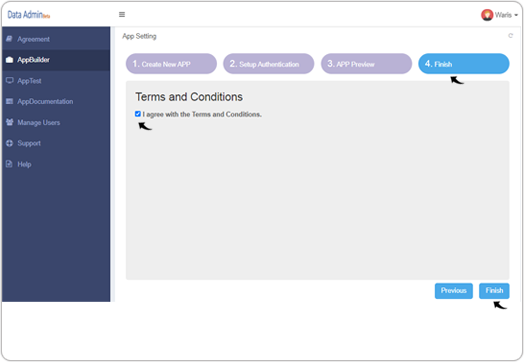
- On the Finish tab, accept the Terms and Conditions
and click Finish.
- Once you have created your first app, app preview page will be displayed.
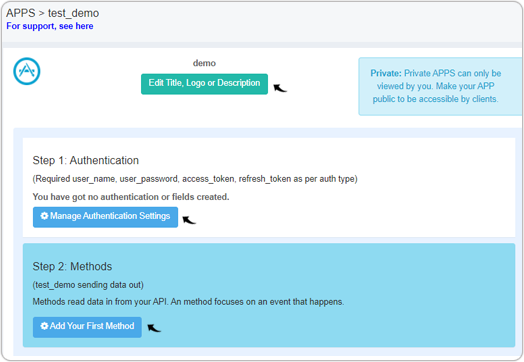
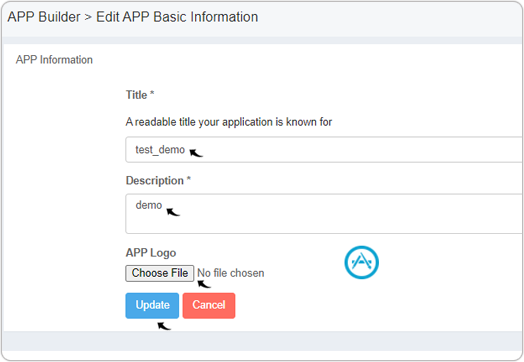
- Click Edit Title, Logo, or Description in step-7 to edit app basic information. Once you edited
the app basic information, click Update.
- Click Manage Authentication Settings in step-7 to edit app authentication information. Follow
can Update APP, Setup Authentication, APP
Preview, and Finish again as described in step-3 to
step-6.
- Click Add Your First Method
step-7 to add app methods.
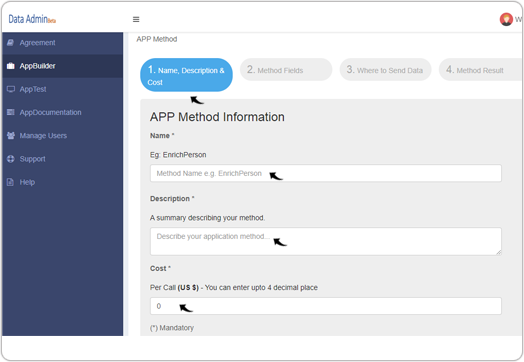
- Step 1 - Name Description & Cost: Give an unique
Name and add Description to your method.
You can also add Cost to your method.
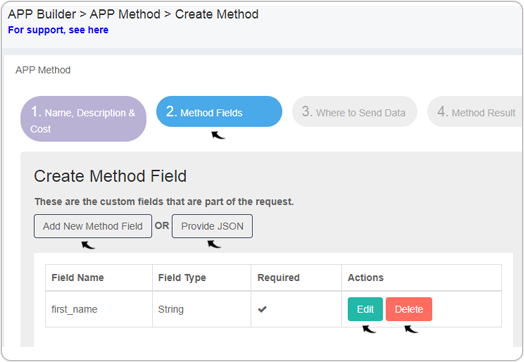
- Step 2 - Method Fields: Define a method to create
your app. You can manage your actions and create an action
field, edit or delete it by clicking on Add New Method
Field, Edit, or Delete. You can also
Provide JSON of your action.
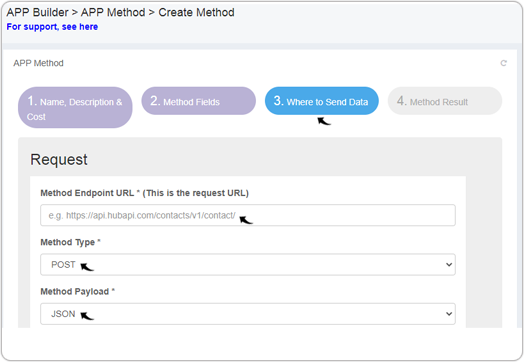
- Step 3 - Where to Send Data: Define your
action/method appearance/behavior by giving the Method
Endpoint URL, Method Type, and selecting
Method Payload. Click Next to
proceed.
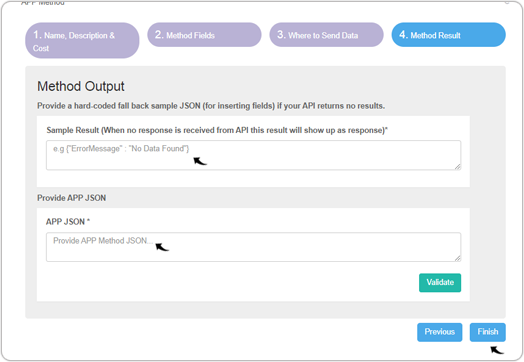
- Step 4 - Method Result: Add JSON for the Sample
Result and APP JSON. Click Finish to
save action or method details.Note: Click on Validate to validate your provided JSON. You can also make changes in your previous steps of action creation by clicking on Previous.
- Step 1 - Name Description & Cost: Give an unique
Name and add Description to your method.
You can also add Cost to your method.
- Click Edit Title, Logo, or Description in step-7 to edit app basic information. Once you edited
the app basic information, click Update.
App Submit
Once you created an app, you must review the details and submit for Enrich.io approval.
To publish your App means to make it public and accessible to end-user. Once you request an app for publishing, your request goes through the review process. Once a decision is made, you are notified via registered email id.
Review results in two scenarios:
-
App Approved and Published
-
App Un-approved and app developer asked to re-submit
It is recommended that the app developers test their app(s) and add documentation before submitting for approval.
Once an app is approved and published, it's accessible and gets listed to data-users - those who use these apps in their workflow(s) to get enrichment of data. You cannot edit or delete a published app. If updates are required in an app, you can contact Enrich.io Support.
Under App Builder- the list of apps shows the list of all apps: drafted, under-review, un-approved and approved.
- Click AppBuilder on the left-side navigation panel and on the APP
Builder page, click Edit on the app that you want to submit for
approval.
- On the app preview page, click Submit for the app approval
process.Note: A meesage "Thank you for your request! Your APP has been submitted successfully. After verification, we'll send you a notification on your registered email." will be displayed after submission of app for approval.
