Create a workflow
Create a workflows using CRM Admin platform.
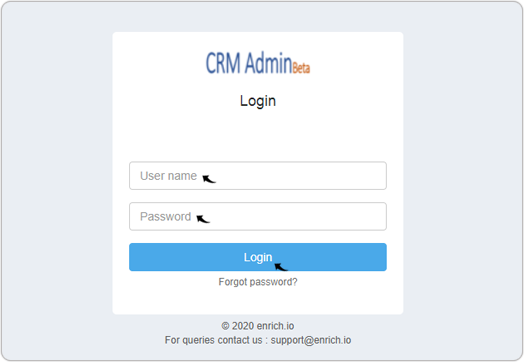
- Contact Enrich.io to get the CRM Admin account and login
details. Once you get the login details, enter User name,
Password, and click Login for your CRM Admin panel.
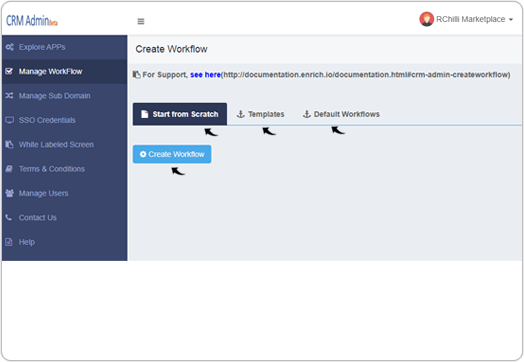
- On the Manage Workflow left-side menu, click Create Workflow.
Note: All the existing workflow will be listed under My Worflows section. You can click View or delete as necessary for the existing workflows.

- On the Create Workflow page, under the Start from Scratch tab,
click Create Workflow.Note: On this page you can select other options as follows:
- Templates: Select this if you want to use existing templates to create your workflow. Choose a suitable template from Templates, and click on Use.
- Default Workflows: Select this if you want to use default wokflow to create your workflow.
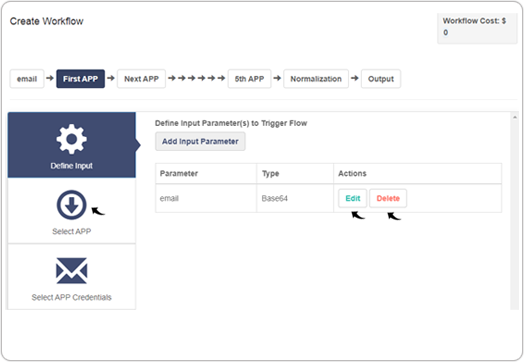
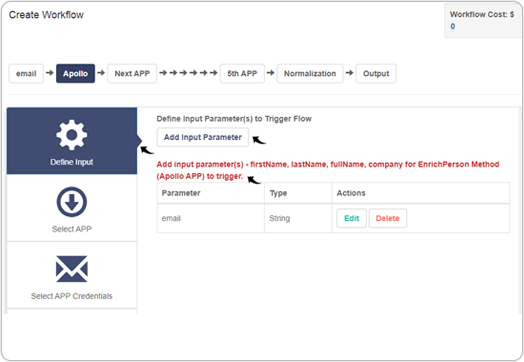
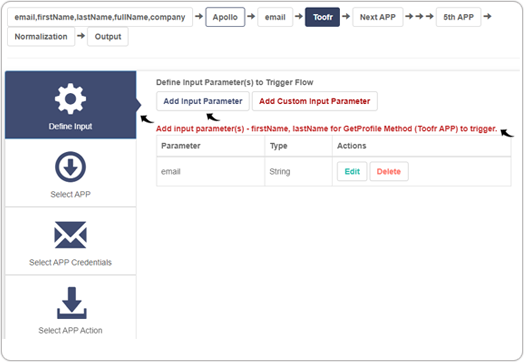
- On the Define Input block, click Add Input Parameter.
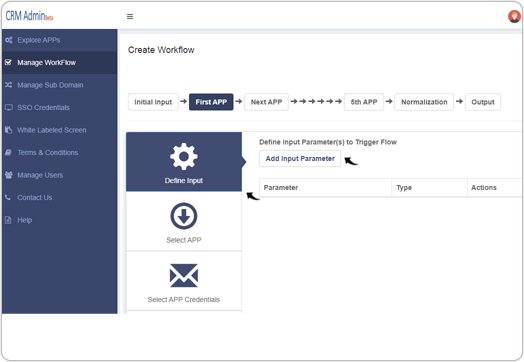
- Once parameters are added, you can Edit or Delete the parameters
as necessary. After input is defined for parameters, click Select APP
block.
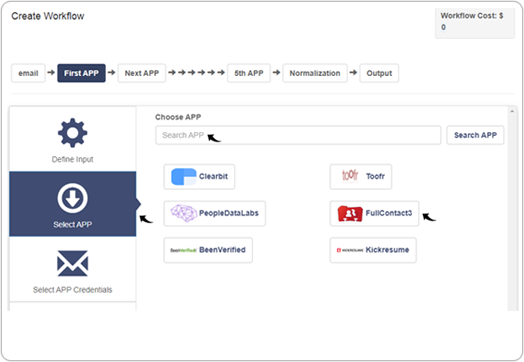
- On the Select APP block, select an App for your workflow.Note: Based on your provided input parameters in above step, APPs are shown in the Select APP block. You can also Search APP by its name.
- On Select APP Credential block, authenticate the app using the available
authentication options.
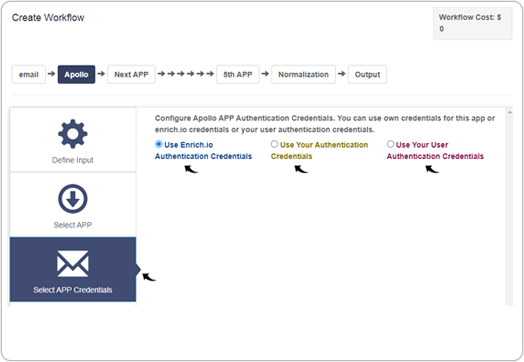
- On Select APP Credential block, authenticate the app using the available
authentication options.
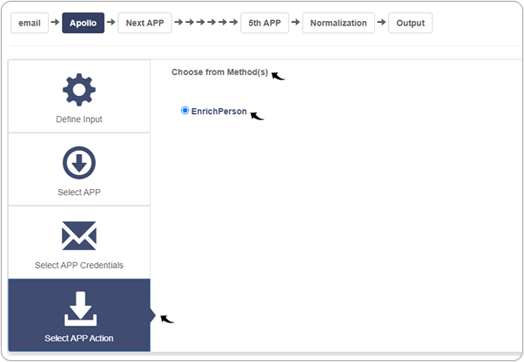
- On Select APP Action block, choose a method from available method
options.
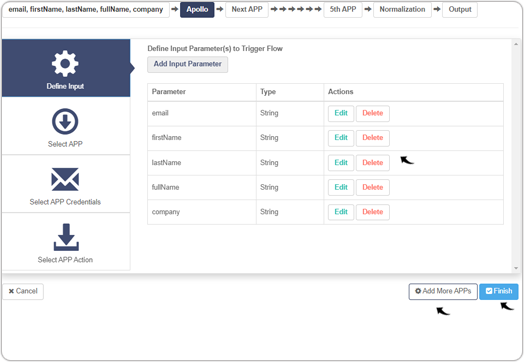
- Go to Define Input block again and check if there is a
message to add more input parameter for the selected method to trigger. Click
Add Input Parameter as many times as needed and make sure you add all
the parameter needed.
- Once you added all the parameters, you get option to Finish the
workflow creation procedure. Click Finish to create the workflow.Note: You can click Add More APPs to add more app to your workflow, see Add More APPs.
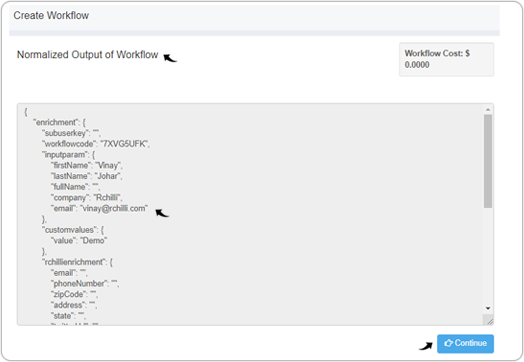
- Once you click Finish in above step, you can view the
Normalized Output of Workflow and click Continue.
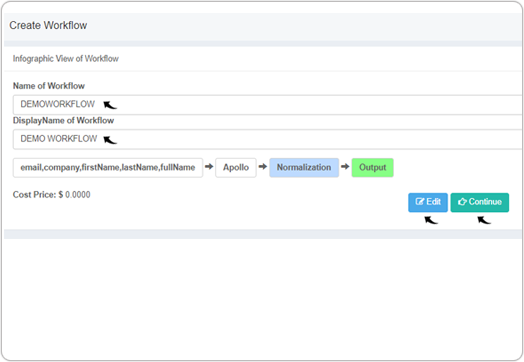
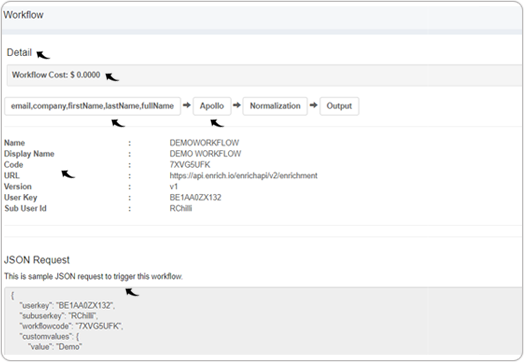
- On Infographic View of Workflow page, enter Name of Workflow,
DisplayName of Workflow, and click Continue.Note: Click Edit to edit the workflow as necessary.
- On the Detail page, you can view the input parameter, app name, name of
workflow, Display Name, Code, URL, Version, User Key, Sub User Id, and sample
JSON Request body.
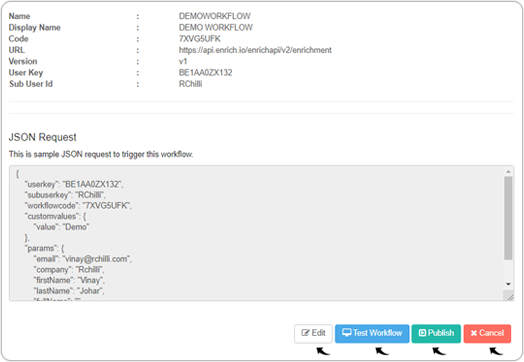
- If you are ok with the details on the Detail page in above step,
you can click as follows for the necessary action:
- Edit: Click Edit if you want to edit the workflow.
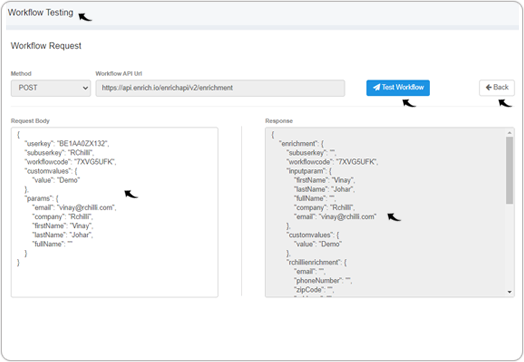
- Test Workflow: Click Test Workflowto test the workflow, see Test Workflow.
- Publish: Click Publish to publish the workflow.
- Cancel: Click Cancel to cancel the workflow.
- Once you click Publish in above step, a message "Congratulation! Your
workflow has been published." will be displayed.

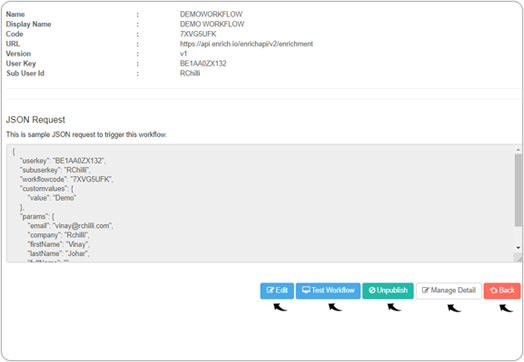
- Once a workflow is published in above step, you can click as
follows for the necessary action:
- Edit: Click Edit if you want to edit the workflow.
- Test Workflow: Click Test Workflowto test the workflow, see Test Workflow.
- UnPublish: Click UnPublish to publish the workflow.
- Manage Detail: Click Manage Detail to manage the details of the workflow, see Manage Detail.
- Back: Click Back to go back in the process.
Add More APPs
In this, select input parameters from initial input parameters (step-10) and previously used app's output parameters in the current workflow. Follow below steps to add more than one apps to your workflow.
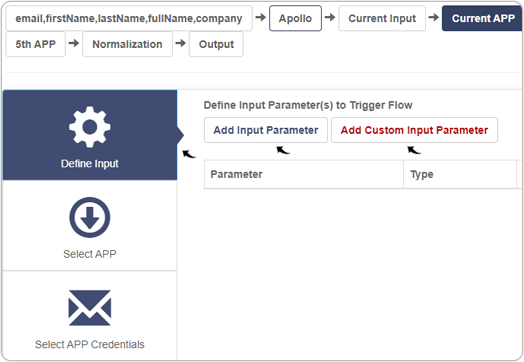
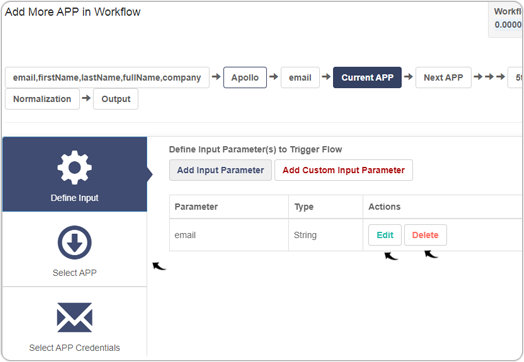
- Once you click Add More APPs in above step-11,
you get options to add input parameter for new app in the Define
Input block. To add input parameter, you can either click Add
Input Parameter or Add Custom Input Parameter.
- Once parameters are added, you can Edit or Delete the
parameters as necessary. After input is defined for parameters, click
Select APP block.
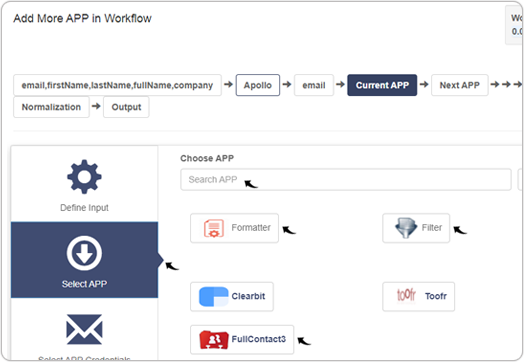
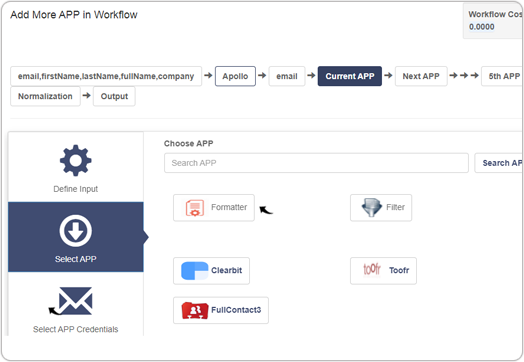
- On the Select APP block, select an App (this is
additional app) for your workflow.Note:
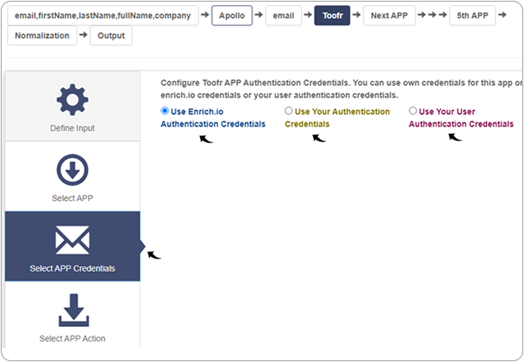
- On Select APP Credential block, authenticate the app using the
available authentication options.
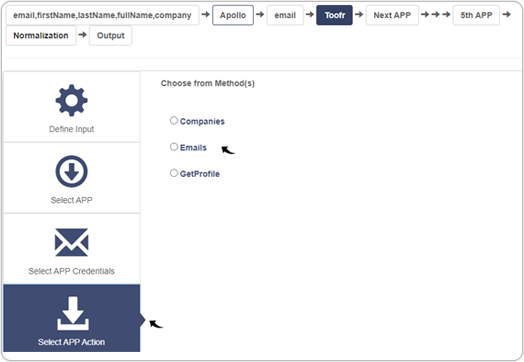
- On Select APP Action block, choose a method from available method
options.
- Go to Define Input block again and check if there is a
message to add more input parameter for the selected method to trigger.
Click Add Input Parameter as many times as needed and make sure you
add all the parameter needed.
- Once you added all the parameters, you get option to Finish the workflow
creation procedure. Click Finish to create the workflow.Note:
- You can click Add More APPs to add more app to your workflow, do step-1 to step-6 again.
- You can click Finish to finish the workflow, follow step-12 to step-17 in above section.
- You can click Skip and Continue to skip adding more apps in the workflow.
- You can click Cancel to cancel the process of adding more apps.

Test Workflow
Manage Detail
Once you click Manage Detail in above step-17, a Manage
Workflow Detail page is displayed. You can do following on this page:
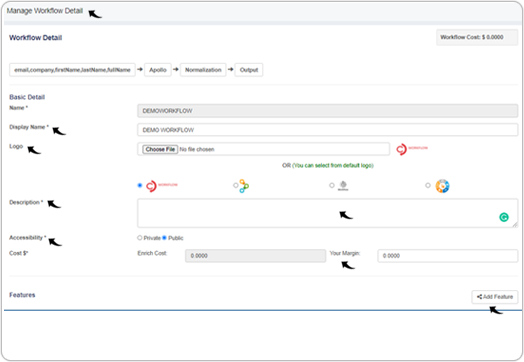
- Display Name: Change the display name of your workflow as necessary.
- Logo: Add logo to your workflow as necessary.
- Description: Add description to your workflow as necessary.
- Accessibility: You can either make the workflow accessible to Public or make it Private.
- Your Margin cost: Add margin cost for your workflow use.
- Feature: Click Add feature to add feature to your workflow.
- Terms and Conditions: Add Terms and Conditions for your workflow use.
- Allow Access to Users: You can give access of your workflow to user or block them.
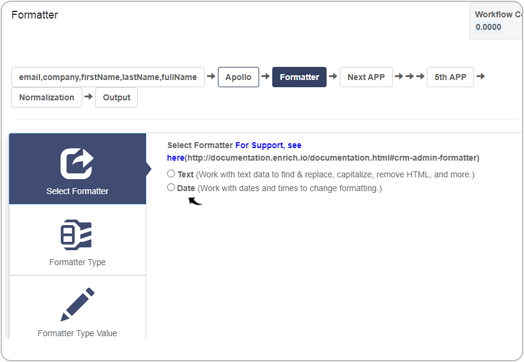
Formatter
Formatter in Enrich.io is used to convert previous app output fields in the required
format as input to the next app in workflow creation process. See below steps on how
to use formatter in workflow:
- When you are adding more apps on the workflow, click Formatter, see
step-3 for more details.
- Select a Formatter of Text or Date as necessary.
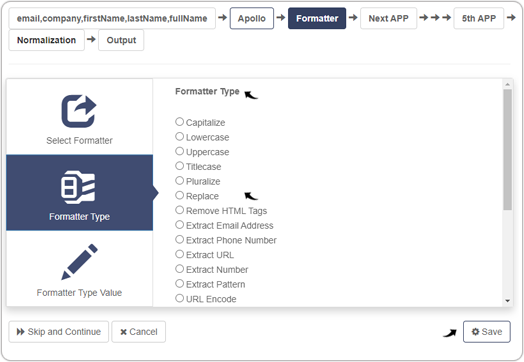
- Based on your formatter selection in above step, you get lists of
Formatter Type. Select a formatter type and click Save.
Note: See step-5 for more details on formatter lists.
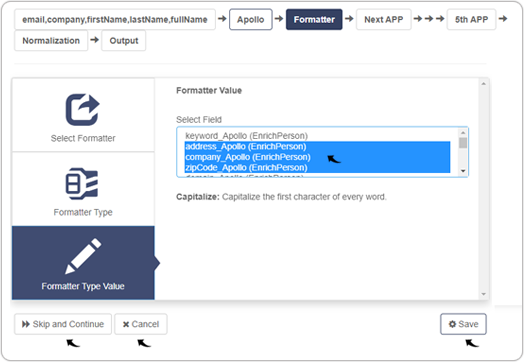
- Once you select Formatter type in above step, select previous app(s)
output fields to format them. You can do following action:
- Save: Click Save to save the formatter configuration.
- Skip and Continue: Click Skip and Continue to skip the formatter configuration and continue with the existing workflow.
- Cancel: Click Cancel to cancel the formatter configuration.
- See the details of the available formatter lists:
- Capitalize: Capitalize the first character of every word.
- Lowercase: Make every character in the text lower case.
- Uppercase: Capitalize every character in a text field.
- Titlecase: Capitalize the first character of every word, except for those with fewer than four characters.
- Pluralize: Pluralize any English word (e.g. frog turns into frogs; child turns into children).
- Replace: Replace any character, word, or phrase in the text with another word or phrase.
- Remove HTML Tags: Remove every HTML tag to leave just the plain text.
- Extract Email Address: Find and copy an email address out of a text field.
- Extract Phone Number: Find Phone Number.
- Extract URL: Extract URL from the text.
- Extract Number: Extract Number from the text.
- Extract Pattern: Extract Pattern.
- URL Encode: Encodes text for use in URLs.
- URL Decode: Decode text.
- Convert Markdown to HTML: Convert Markdown formatted text into HTML.
- Split Text: Split Text.
- Trim Whitespace: Remove extra spaces at the end of the text.
- Length: Count the number of characters in a field.
- Word Count: Count the number of words in a text field.
- Convert to ASCII: Replaces all non-ASCII or special characters in a text field with normal characters.
- Default Value: Return default value if the text is empty.
- Find: Find a set value in a field.
- Truncate: Limit your text to a specific character length, and delete anything over that.
- Change Date Format: Change Date Format.
- dd-MM-yy
- dd-MM-yyyy
- MM-dd-yyyy
- yyyy-MM-dd
- yyyy-MM-dd HH:mm:ss
- yyyy-MM-dd HH:mm:ss.SSS
- yyyy-MM-dd HH:mm:ss.SSSZ
- EEEEE MMMMM yyyy HH:mm:ss.SSSZ
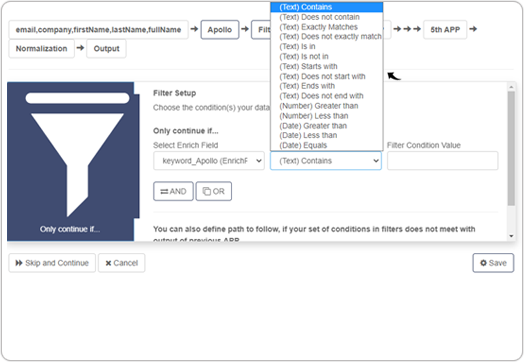
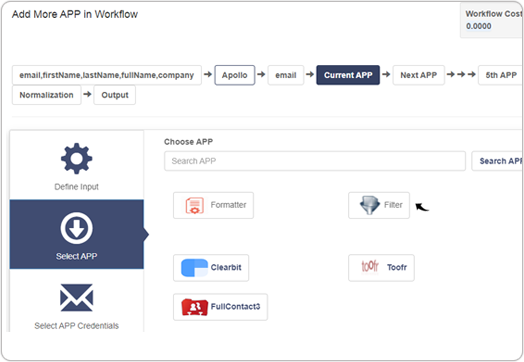
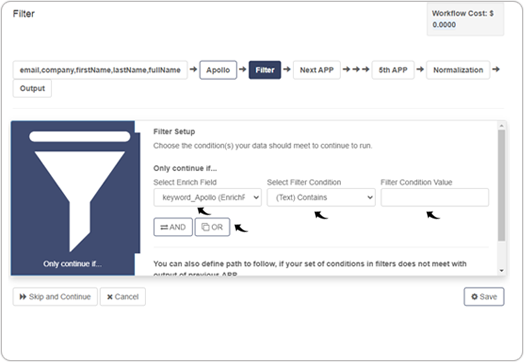
Filters
Filters are a way to ensure actions get performed only on the items you want. With
filters, you can set a specific condition, if condition is true, it will proceed the
next step of the workflow. You can also set else path of workflow, if the condition
is false.
- When you are adding more apps on the workflow, click Filters, see
step-3 for more details.
- You can apply filters to the output of previous app(s) output fields by
selecting workflow's previous app(s) output field. Then, Select Filter
Condition, and provide Filter Condition Value.Note: You can also add AND or OR condition by clicking on AND/OR.
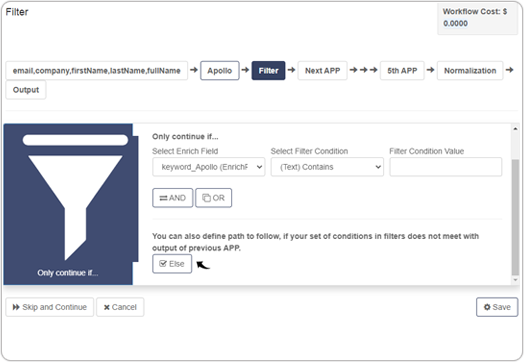
- You can also define the path to follow, if your set of conditions in filters
does not meet with the output of previous APP. For this, click on
Else.
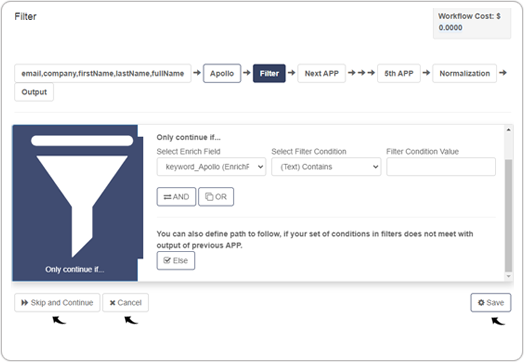
- Once you selected Filter in the above steps, you can do following
action:
- Save: Click Save to save the filter configuration.
- Skip and Continue: Click Skip and Continue to skip the filter configuration and continue with the existing workflow.
- Cancel: Click Cancel to cancel the filter configuration.
- See the details of the available filter lists:
- Contains: Check workflow output field contains your given value.
- Does not contain: Check workflow output field does not contain your given value.
- Exactly Matches: Check workflow output field exactly matches your given value.
- Does not exactly match: Check workflow output field does not exactly match your given value.
- Is in: Check workflow output field has your given value.
- Is not in: Check workflow output field is not in your given value.
- Starts with: Check workflow output field starts with your given value.
- Does not start with: Check workflow output field does not start with your given value.
- Ends with: Check workflow output field ends with your given value.
- Does not end with: Check workflow output field does not end with your given value.
- Greater than - Number: Check workflow output field is greater than your given value.
- Less than - Number: Check workflow output field is less than your given value.
- Greater than - Date: Check workflow output field is greater than your given value.
- Less than - Date: Check workflow output field is less than your given value.
- Equals: Check workflow output field equals to your given value.